

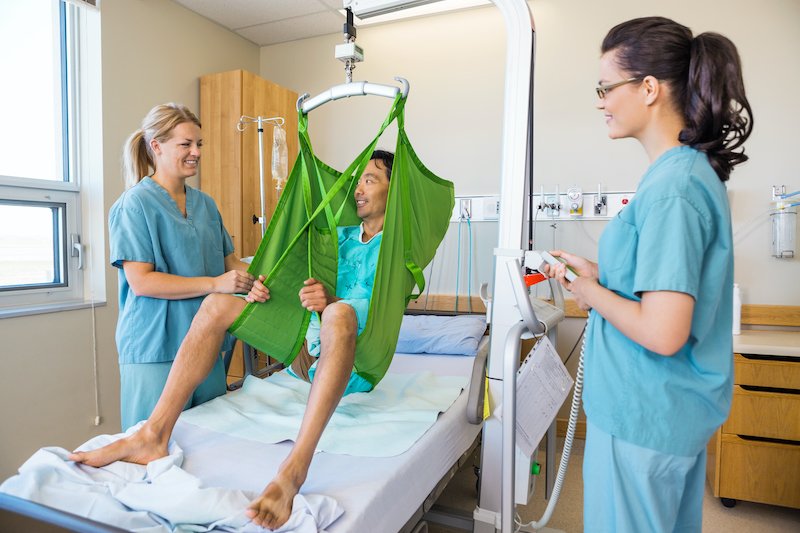
Patient lifts are special tools that help transfer patients from surface to surface. Hoyer lifts, in particular, are top-brand lifts that offer a sturdy and safe patient transfer experience.
These lifts use a sling that wraps around and supports the patient who needs transferring. There are many different types of Hoyer lift slings to choose from; however, full body U-slings are recommended for most transfers.
In this article, you’ll learn what a full body sling is and how to transfer a patient effectively. Keep reading to learn more!
Table of Contents:
- What is a Full Body U-Sling?
- Lifting From a Seated Position
- Lifting From a Horizontal Position
- Positioning Into a Chair
- Positioning Onto a Bed
- Important Notice for Patient Lifts
What is a Full Body U-Sling?
The U-sling provides support for the entire body and positions the patient in a slightly reclined posture, appropriate for someone with poor torso stability. U-slings are recommended for transfers to and from the bed, commode, wheelchair, or lift chair.
Moreover, it is important to choose the right size Hoyer lift sling. A patient may slide out if the sling is too large, or pinch the thighs and cause discomfort if it is too small.
Keep reading to learn how to use a Hoyer lift with a full body sling!
Hoyer Lift Sling Instructions
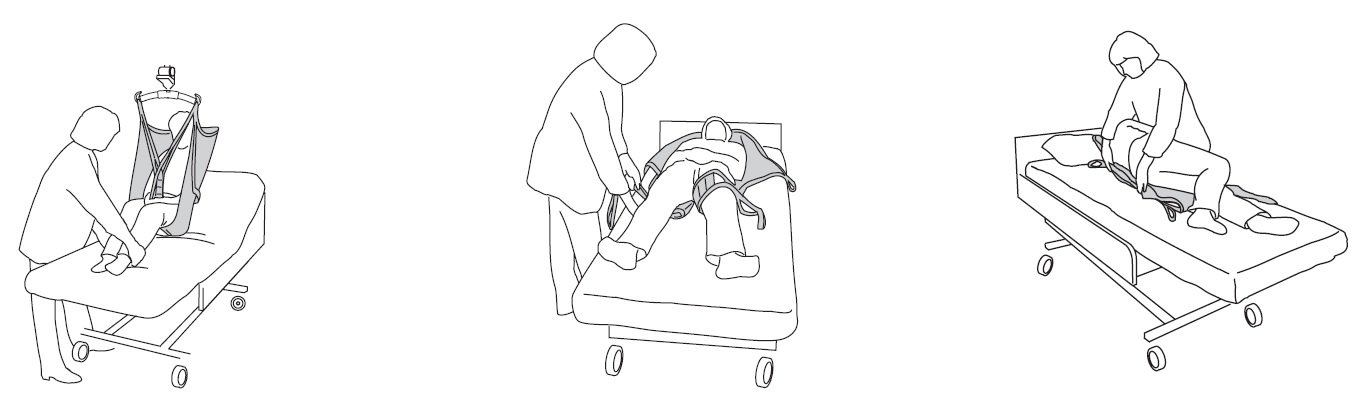
Lifting From a Seated Position
Two caregivers may be required for safe transfers. The patient should be leaning forward, while one caregiver positions the sling, the second caregiver stands in front of the patient to prevent him/her from falling out.
- Place the sling behind the patient’s back with the product label or positioning straps facing out. Fold the lower edge over your fingertips to make it easier to guide the sling into position.
- With the palm of your hand, press the lower edge of the sling down to the patient’s coccyx, this is very important. Correct positioning is facilitated if the patient leans forward somewhat.
- Pull the leg supports out alongside the outside of the thighs. Helpful hint: By placing your palm between the body and the leg support, you can guide the leg support’s lower edge strap down to the seat. At the same time, pull the leg support forward with your other hand to stretch it out.
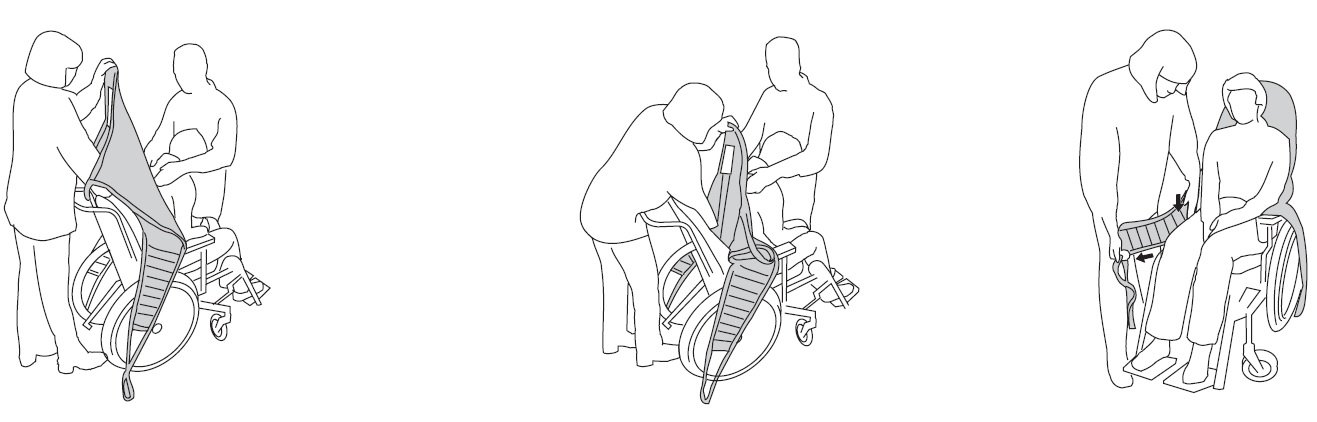
- Helpful hint: Applying light pressure to the kneecaps will allow you to pull the leg supports taut against the buttocks and smooth out any creases near the back. Make sure both leg supports reach equally far forward.
- Guide the sling’s leg supports under each thigh. Make sure the fabric is smoothed out under the thighs and that it reaches properly around the legs.
- Normally, one leg support is passed through the other to cross before they are hooked to the hanger bar. Hang the upper strap loops on the hanger bar, then the leg support loops. Lift.
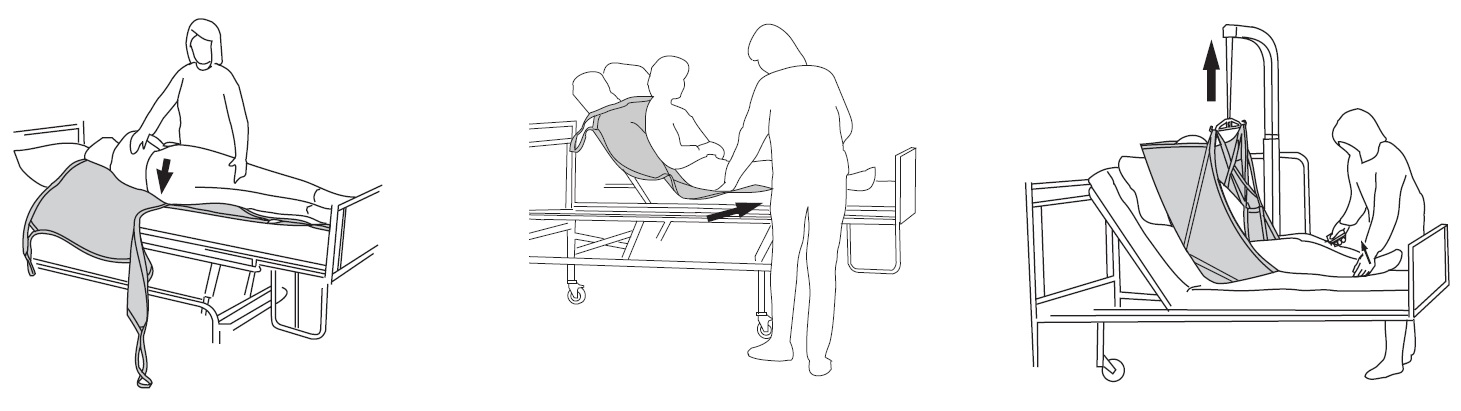
Lifting from a horizontal position
If you have an adjustable bed, raise or lower it to ensure patient comfort and caregiver safety during transfer.
- Turn the patient towards you to prevent the risk of him/her falling out of the bed. Place the lower edge of the sling as far down under the patient as possible, so that it is in level with the patient’s coccyx. Bunch the sling together in a couple of folds and lay it so that its “center of the back” corresponds to the position of the patient’s spine when he/she is gently turned back. Carefully work the sling out from the opposite side. Raise the backrest of the bed if available.
- Slide the leg supports in place under the thighs. This is easiest if the knees are bent. Make sure the fabric is smoothed out under the thighs and that it reaches properly around the legs. The leg supports can then be hooked to the hanger bar in different ways.
- If necessary, place a small pillow under the patient´s head. Hang the upper strap loops to the hanger bar first, then the leg support loops. Lift.
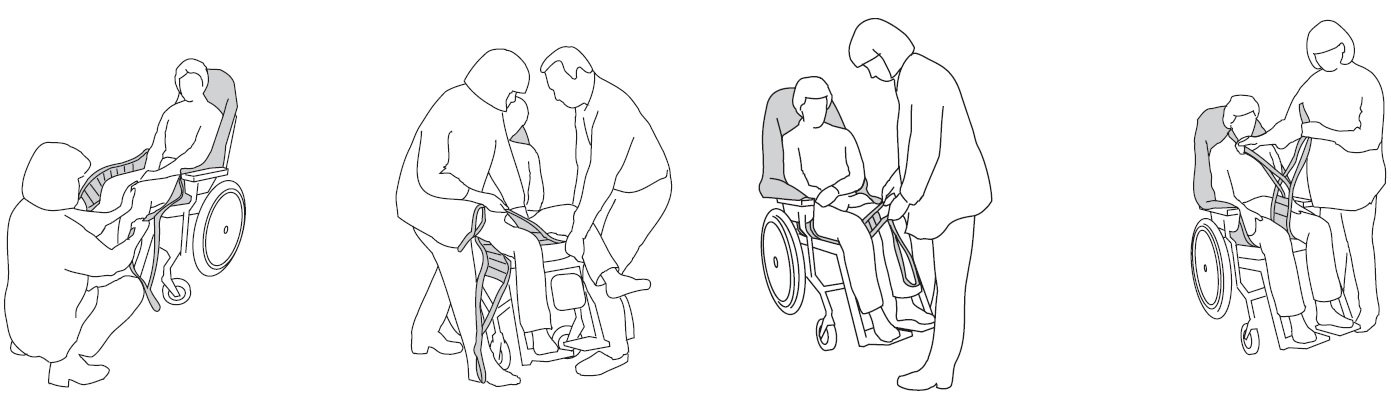
Positioning into a chair
When positioning a patient in the chair, make sure he/she is placed far enough back to be comfortable. To facilitate placement in the chair, tilt the chair back somewhat during lowering. Let the patient’s bottom slide down the back of the chair during the final stage of lowering. Guide the position of the wheelchair by placing your foot on the tipping lever.
Press lightly under the patient’s knees during lowering so that his/her bottom is guided in towards the back of the chair. Carefully remove the leg supports. The gentlest way is to pass the strap beneath the leg support and pull it out under the fabric. Remove the sling by pulling it carefully upwards.

Positioning onto a bed
Guide the patient over the bed and raise the back support for best possible comfort. Lower the patient to the bed. Lower the back support. Remove the leg supports by pulling the strap loops out under the fabric. Turn the patient carefully on one side and roll the sling in under him/her. Turn the patient gently on his/her back and carefully remove the sling.
Important Notice for Patient Lifts
In addition to using safe patient transfer techniques, you also need to be aware that lifting and transferring a patient always involves a degree of risk.
Always review the instruction guides for both patient lift and sling carefully. A complete understanding of the contents of instructions is essential.
Additionally, only trained personnel should use the equipment. Make certain that the lift accessories are appropriate for the lift you are using and for the lifting situation—exercise caution and care when using lift equipment and accessories.
As a caregiver, you are responsible for the patient’s safety. You must be well informed of the patient’s condition and ability to manage the lifting situation. Inspect the sling before each use. Check carefully for wear and damage to seams, material/fabric, straps, and strap loops. Never use damaged accessories! When in doubt, contact the manufacturer or supplier.
Purchase Your Hoyer Lift Today!
Are you on the market for a top-quality Hoyer lift, a full body U-sling, or Hoyer lift replacement parts?
Amica Medical Supply is the largest online distributor for medical products, and they guarantee the best prices!
Start shopping today or contact us for more information!

We are needing to get a sling for my grandmother because we cannot transfer her on our own. These are good tips of how to use a sling to help her. It is nice that there are multiple ways it can be done and that the U-sling provides support for the entire body.
very informative